Need to resize hundreds of images? Doing it one by one takes hours. Batch resizing lets you resize multiple images at once, saving massive amounts of time. Whether you're preparing images for a website, social media, or email, batch processing is essential.
Quick Answer
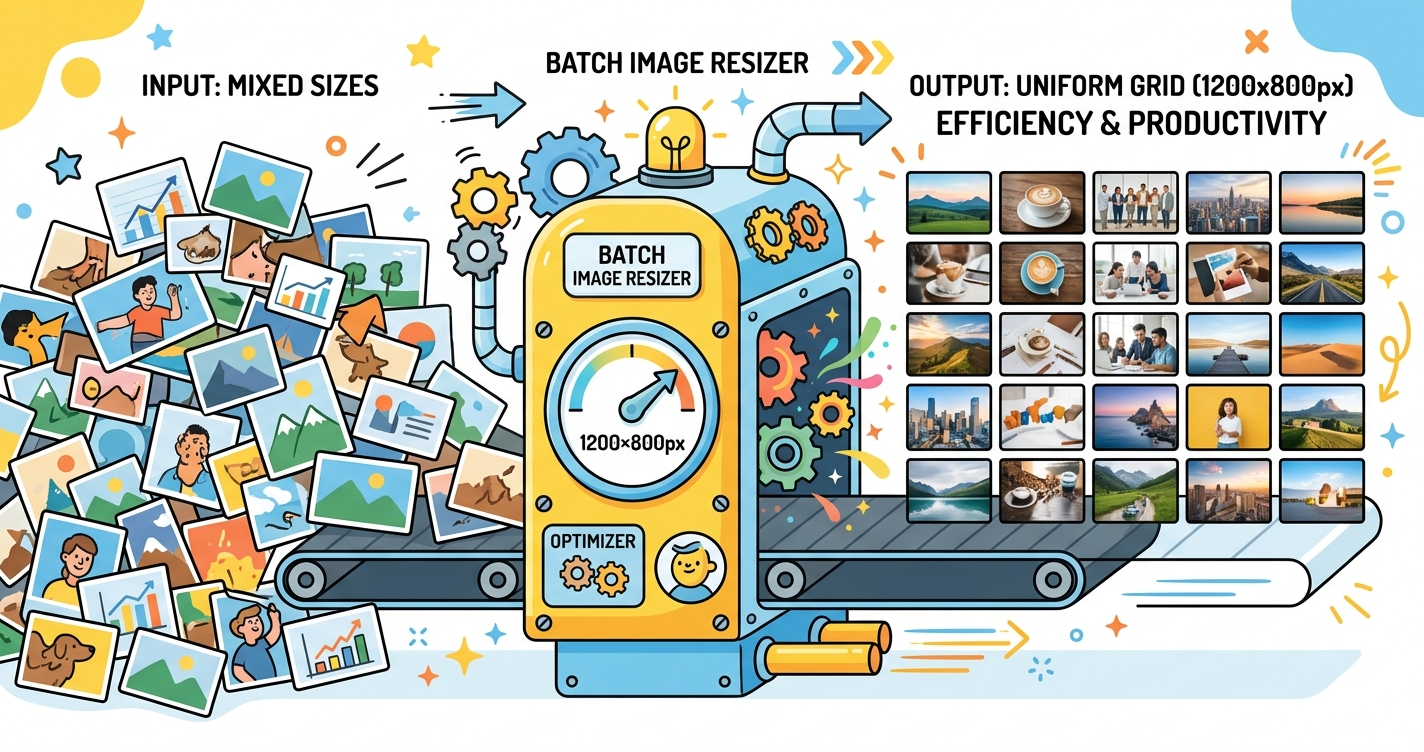
Use Free Media Tools' batch image resizer to resize multiple images at once. Upload up to 100 images, set target dimensions, and resize all simultaneously. Free, fast, and maintains quality. No software installation required.
Why Batch Resize Images?
1. Massive Time Savings
Manual resizing:
- 100 images × 2 minutes each = 200 minutes (3.3 hours)
Batch resizing:
- 100 images in 5 minutes = 195 minutes saved
2. Consistency
Batch resizing ensures all images have identical dimensions, maintaining visual consistency across your website or project.
3. Efficiency
Process hundreds of images while you work on other tasks. Set it and forget it.
4. Common Use Cases
- E-commerce: Resize product photos to consistent dimensions
- Photography: Prepare portfolio images for web
- Real estate: Resize property photos for listings
- Social media: Prepare images for Instagram, Facebook, etc.
- Web development: Optimize images for website
- Email marketing: Resize images for newsletters
How to Batch Resize Images (Step-by-Step)
Method 1: Online Batch Resizer (Recommended)
Best for: Quick resizing, any device, no software installation
Steps:
- Go to freemediatools.online/resize-image
- Click "Choose Files" and select multiple images (or drag folder)
- Enter target dimensions (e.g., 1200×800)
- Select "Maintain aspect ratio" (recommended)
- Click "Resize All Images"
- Download resized images as ZIP file
Pros:
- No software installation
- Works on any device
- Free and unlimited
- Maintains quality
- Privacy-focused (local processing)
Capacity: Up to 100 images per batch
Method 2: Windows (Using PowerToys)
Best for: Windows users, offline processing
Steps:
- Install Microsoft PowerToys (free)
- Right-click images → Show more options → Resize pictures
- Select size preset or enter custom dimensions
- Choose "Resize original pictures" or "Make resized copies"
- Click "Resize"
Pros:
- Built into Windows (with PowerToys)
- Fast processing
- Works offline
Cons:
- Windows only
- Requires software installation
- Limited format options
Method 3: Mac (Using Automator)
Best for: Mac users, offline processing
Steps:
- Open Automator (built into Mac)
- New Document → Quick Action
- Add action: "Scale Images"
- Set target size (e.g., 1200 pixels)
- Save as "Batch Resize"
- Right-click images → Quick Actions → Batch Resize
Pros:
- Built into Mac
- No software installation
- Fast processing
Cons:
- Mac only
- Requires initial setup
- Less intuitive than online tools
Method 4: Photoshop (Professional)
Best for: Professional photographers, precise control
Steps:
- File → Scripts → Image Processor
- Select folder with images
- Set dimensions and quality
- Choose output format
- Click "Run"
Pros:
- Professional-grade quality
- Precise control
- Can apply other edits simultaneously
Cons:
- Expensive ($22.99/month)
- Overkill for simple resizing
- Requires software installation
Method 5: GIMP (Free Alternative)
Best for: Free Photoshop alternative
Steps:
- Install GIMP and BIMP plugin
- Filters → Batch Image Manipulation
- Add images
- Add manipulation: Resize
- Set dimensions
- Click "Apply"
Pros:
- Free and open source
- Professional features
- Cross-platform
Cons:
- Requires software installation
- Steeper learning curve
- Plugin installation needed
Real-World Example: Real Estate Agent
A real estate agent had 500 property photos from 10 listings, all different sizes (3000×4000 to 6000×4000).
Problem:
- Website required 1200×900 images
- Manual resizing would take 16+ hours
- Inconsistent sizes looked unprofessional
Solution:
- Used our batch resizer
- Uploaded all 500 images
- Set target: 1200×900, maintain aspect ratio
- Processed in 5 batches (100 images each)
- Total time: 15 minutes
Results:
- Time saved: 15.75 hours
- All images consistent size
- Website load time: 85% faster
- Professional appearance
- Client satisfaction increased
Batch Resize Settings Explained
Maintain Aspect Ratio
What it does: Keeps original proportions, prevents distortion
Example:
- Original: 4000×3000 (4:3 ratio)
- Target: 1200 width
- Result: 1200×900 (maintains 4:3 ratio)
When to use: Almost always (prevents stretched/squashed images)
Exact Dimensions
What it does: Forces exact dimensions, may crop or distort
Example:
- Original: 4000×3000 (4:3 ratio)
- Target: 1200×1200 (1:1 ratio)
- Result: 1200×1200 (cropped or distorted)
When to use: When exact dimensions are required (e.g., profile pictures)
Percentage Scaling
What it does: Resizes by percentage of original
Example:
- Original: 4000×3000
- Scale: 50%
- Result: 2000×1500
When to use: When you want proportional reduction without specific dimensions
Best Practices for Batch Resizing
1. Organize Images First
Before resizing:
- Create folders by category
- Remove unwanted images
- Rename files descriptively
Benefits:
- Easier to manage
- Faster processing
- Better organization
2. Backup Originals
Always keep original high-resolution files
Why:
- Can't upscale later without quality loss
- May need different sizes in future
- Originals are your master copies
How:
- Copy originals to backup folder
- Resize copies, not originals
- Use cloud storage for backups
3. Choose Appropriate Dimensions
Common target sizes:
| Use Case | Recommended Size |
|---|---|
| Website hero images | 1920×1080 or 2400×1600 |
| Website content images | 1200×800 or 1600×1200 |
| Thumbnails | 300×200 or 400×300 |
| Instagram feed | 1080×1080 or 1080×1350 |
| Instagram stories | 1080×1920 |
| Facebook posts | 1200×630 |
| Email images | 600×400 or 800×600 |
| Product photos | 1200×1200 or 1500×1500 |
4. Compress After Resizing
Resizing reduces dimensions but not always file size. Compress after resizing for maximum reduction.
Workflow:
- Batch resize images
- Batch compress images (use our compressor)
- Result: 90-95% smaller files
5. Test One Image First
Before batch processing hundreds of images:
- Resize one image
- Check quality and dimensions
- Verify it meets requirements
- Then process all images
What to Avoid: Batch Resizing Mistakes
1. Resizing Originals
Resizing original files means you can't go back to high resolution.
Solution: Always resize copies, keep originals as backup.
2. Not Maintaining Aspect Ratio
Forcing images into wrong dimensions creates distortion (stretched or squashed).
Solution: Always maintain aspect ratio unless exact dimensions are required.
3. Upscaling Images
Enlarging images creates blurriness and pixelation.
Solution: Only resize down (make smaller), never up (make larger).
4. Wrong Format
Saving photos as PNG creates huge files. Saving logos as JPG creates artifacts.
Solution:
- Photos → JPG or WebP
- Logos/graphics → PNG or WebP
5. Over-Compressing
Using low quality settings creates blurry, pixelated images.
Solution: Use 85-90% quality for JPG. Our tool uses optimal settings by default.
6. Not Checking Results
Processing hundreds of images without checking can waste time if settings are wrong.
Solution: Test one image first, verify results, then process all.
Batch Resize for Different Use Cases
For E-commerce
Requirements:
- Consistent dimensions (e.g., 1200×1200)
- White or transparent background
- High quality (85-90%)
- Optimized file size
Workflow:
- Batch resize to 1200×1200
- Batch compress at 85% quality
- Convert to WebP for web use
For Photography Portfolio
Requirements:
- Maintain aspect ratio
- High quality (90-95%)
- Watermark (optional)
- Consistent maximum dimension
Workflow:
- Batch resize to max 2400px width
- Maintain aspect ratio
- Compress at 90% quality
- Add watermark (if needed)
For Social Media
Requirements:
- Platform-specific dimensions
- Optimized for mobile
- Fast loading
- Good quality
Workflow:
- Batch resize to platform dimensions
- Compress at 85% quality
- Test on mobile device
For Email Marketing
Requirements:
- Small file size (under 100KB per image)
- Reasonable quality
- Fast loading
- Mobile-friendly
Workflow:
- Batch resize to 600×400
- Compress at 80-85% quality
- Convert to JPG format
Frequently Asked Questions
How do I resize multiple images at once?
Use our batch image resizer to upload multiple images, set target dimensions, and resize all at once. Free, fast, and maintains quality.
Can I batch resize images for free?
Yes, our tool is completely free with no limits. Resize unlimited images without subscriptions or hidden fees.
How many images can I resize at once?
Our tool supports up to 100 images per batch. For more, process in multiple batches.
Does batch resizing reduce quality?
Resizing down (making smaller) with proper tools maintains excellent quality. Our tool uses high-quality Lanczos resampling to preserve sharpness.
Can I batch resize images on my phone?
Yes, our web-based tool works on any device including phones and tablets. No app installation required.
What's the best way to batch resize images?
Online tools like ours are best for most users: no software installation, works on any device, free, and maintains quality.
Can I batch resize and compress images?
Yes, resize first then compress. Use our resizer then our compressor for maximum file size reduction.
How do I batch resize images in Windows?
Install Microsoft PowerToys (free), right-click images, select "Resize pictures", choose dimensions, and click "Resize".
Advanced Batch Resizing Tips
1. Use Consistent Naming
Rename files before resizing for better organization.
Example naming convention:
- product-name-001.jpg
- product-name-002.jpg
- product-name-003.jpg
2. Process by Category
Resize images in batches by category or use case.
Example:
- Batch 1: Hero images (1920×1080)
- Batch 2: Content images (1200×800)
- Batch 3: Thumbnails (400×300)
3. Automate Workflow
For regular batch resizing, create automated workflows.
Tools:
- Mac: Automator
- Windows: PowerShell scripts
- Online: Our batch resizer
4. Quality Control
After batch resizing, spot-check random images to verify quality.
Check for:
- Correct dimensions
- Good quality (not blurry)
- Proper aspect ratio
- Acceptable file size
Related Tools You Might Need
-
Image Compressor — After batch resizing, compress images to reduce file size by 60-80% without quality loss.
-
Image Converter — Batch convert images to WebP format for 25-35% smaller file sizes.
-
Image Cropper — Crop images to specific aspect ratios before batch resizing for perfect composition.
Why Our Batch Resizer is Best
- No software installation - Works in browser
- Fast processing - Resize 100 images in minutes
- High quality - Uses Lanczos resampling
- Privacy-focused - Files processed locally
- No limits - Resize unlimited images
- Free forever - No subscriptions
- Any device - Works on desktop, mobile, tablet
- Batch download - Get all resized images as ZIP
By Muhammad Hasnain Adam — Full-stack developer and creator of Free Media Tools. I built this batch resizer to save people hours of tedious manual work, making it easy to resize hundreds of images in minutes without expensive software or technical knowledge.